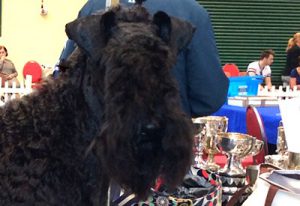
 Grooming – You may choose to use a professional groomer to get your Kerry Blue looking tip top and just tidy him up in between appointments. You could choose to learn how to groom your dog yourself which is very rewarding too.
We are working on this page so in the meantime please see below a checklist for grooming:
Always bathe your dog, comb it out thoroughly, and dry it completely before beginning to trim. Using a cream rinse or detangler on the coat can help remove snarls and tangles.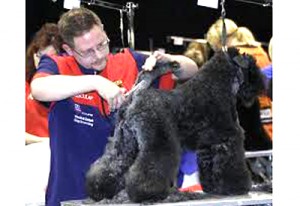
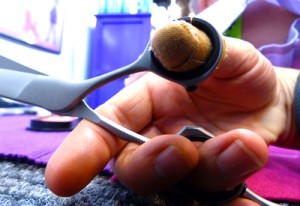
Keep your shears and clipper blades ultra-sharp. If you don’t know where to have them sharpened, contact any local dog grooming salon and ask where they have their equipment sharpened.
Keep your equipment clean. Store your shears in their protective cases when not in use, and follow the guidelines that came with your clippers for cleaning the blades and regular maintenance.
Reduce heating of the clipper blades and keep them lubricated by using any of the coolant/lubricating sprays available at all good online grooming sites.
Always handle shears and clippers with absolute care to avoid injury to your dog.
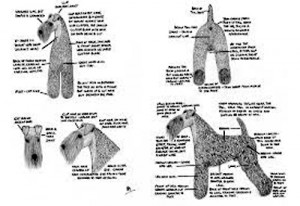
Be patient with your dog and with yourself. It will show in the finished “product,” and you’ll both be happier with the results!
Kerry Puppy Tutorial – Setting the Ears
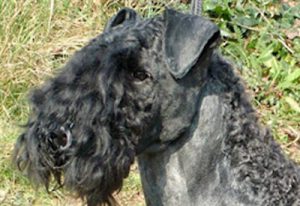
Ears vary in size, shape, and placement on the head, you have to take this into consideration when setting the ears, some ears flaps are thick and heavy and require different attention to ones which are thin
- Ear setting usually starts at 10 – 12 weeks.
- It will probably be necessary to continue to set ears until teething is finished, or sometimes until they are older, if they are not sitting right.
- With clippers, remove the hair from the ear as well as the top of the skull Clipper with a fine blade in the direction of
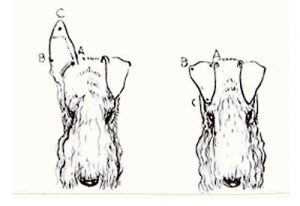
Ear Setting Diagram the hair. Leaving approx. ¼ inch of hair on the top of the skull. Look at the pup and call him to see where the ear sits naturally.
- Place the puppy’s ears into position with your hands to see how they should be set.
- Get the glue, (Copydex), someone to hold the pup, and some tissues in case of spills
- Turn the first ear straight up and put a small amount of glue in the little well between the ear and the skull on the outside of the ear.
- On the inside of the ear, run a narrow line of glue from point A along the inner edge of the ear to point C. (see diagram)
- Cover the inside tip of the ear at point C with enough glue to coat the tip of the ear from edge to edge.
- Place your thumbs at points A and B. Let the ear drop over naturally toward the center of the skull. Press the ear at point A down onto the skull.
- Press the edge of the ear, from point A to point C flat onto the skull. Make sure the ear is smooth, not wrinkled, and the fold in the ear is above the top of the skull. (see diagram)
- Do not pinch the fold of the ear together from point A to point B. The ear should fold over easily with a very slight roll so that it will look natural.
- Make sure the fold is not much more than a quarter inch above the skull.
- The inner edges of the ears from point A to point C should be parallel to each other. (see diagram)
- Point C should be just above the outer corner of the eye, but do not pull the ear forward to the point of hyperextension. Point C may be pressed down into the indentation above the eye.
- Hold the puppy’s muzzle and check the ears for symmetry.
- The side of the ear from point B to point C must be left open for ventilation.
- The ear should not be too high above the skull before folding forward, and the tip should point to the outside corner of the eye, not down on the lower part of the cheek, or toward the inside corner of the eye.
- Nothing should be put into the ear in the fold from A to B, and do not put glue inside from A to B.
- After sticking down the glued ear, hold the puppy’s head still to prevent him from shaking his ears free.
- Repeat the entire procedure for the other ear.
Ears which have not been set, called “flying or rose ears” - The ears should be separated from a half inch to an inch in the middle of the skull, depending on the width of the skull and the size of the ears.
- When the tip of the ear is glued just above or back from the outer corner of the eye, the tip will touch the cheek as called for in the Standard.
- The line across the fold of the ear will be level.
- Ears should remained glued for 3 weeks. Left up any longer and the hair will be so long that the ears will rise with the hair and be set too high.
- When puppies play with litter mates, or other dogs, the ears may be pulled down, or in some cases licked down by playmates. This can cause sore spots that must be monitored for signs of infection. If infection occurs for any reason, apply medicated powder to keep the infected area dry, or in extreme cases take the ear down and consult your veterinarian.
- Never glue sore or infected ears. They will not set well and you will guarantee an unpleasant experience for the puppy. Leave them down until they are completely healed.
- After the ears have been set once or twice, evaluate their set and make corrections. Ask for assistance from someone more experienced to check your set and make suggestions.
- Never hurry the ear setting process.
If in doubt ask the opinion of the breeder or an experienced Kerry person